
Instant pot chicken shawarma and laffa bread

This may be one of my favorite dinners we’ve had so far, but it did require quite a bit of work as I chose to make the pickled turnips as well as the laffa bread instead of using store bought pita bread.
The pickled radishes came from this easy recipe, Middle Eastern Pickled Turnips. It required some thinking ahead as it took a few days in the fridge to get to that tangy pickle stage, but it was super easy and both my kids thought they were delicious so not only did my husband and I love them as the tang and crunch in our dinner, but Dom and Gabs kept requesting more. Who would think the favorite part of the meal for the 4 and 2-year olds would be turnips?
 Making the laffa bread required some decent counter space and time. Dough always needs time (and am I the only one that has issues with my home not being warm enough for it to raise well? sigh!).
I spent about 10 minutes kneading, after mixing all of the ingredients. Then, it took about an hour for it to rise. After that, I still needed to take the time to break it into smaller balls, roll those out, and grill them up on the grill pan, as pictured. My apron was rather floury that day.
For the chicken shawarma, I had never made that before so on that afternoon, as I sat at my son’s piano lesson (and my toddler played little nursery rhyme games on her kindle), I read varying recipes online and based mine off of this one, over on a site called Little Bits Of.
That week, it was the week of CHICKEN.
I’m not a big fan of chicken, I have to tell you. I’m seriously nervous about serving raw chicken, which is a dangerous fear because that tends to mean that you dry out your bird as you’re more likely to overcook it. Gah. But anyway… we ate a lot a lot a lot of chicken that week because we had two packages of rotisserie chicken from Costco. Have you seen those? They’re not the whole birds they sell a gabajillion of (157,000 every day, apparently!). These are vacuum packed bits of the chicken so you don’t have to worry about the skin or the bones. Of course, it costs a pretty penny more to have it already pulled off of the bone, but we had purchased it to help with serving a mass amount of chicken enchiladas at a family vacation with extended family. Turns out, we over bought so we needed to cook ALL THE CHICKENS!
We try hard to introduce our kids to new foods often, hopefully helping them to be good eaters. More about that on my post over at mommyhighfive.com!
Anyway, enough of my rambling. Here are the recipes. The best thing about this is there are so many delicious spices so you get flavor galore. Boom. Win.

Instant Pot Chicken Shawarma and Homemade Laffa Bread
Ingredients
Laffa Bread
- 3 1/2 C bread flour (plus extra if sticky)
- 1 1/8 t yeast (or 1/2 a package)
- 1 T sugar
- 1/2 t salt
- 2 T olive oil
- 1 1/2 C warm water
Instant Pot Chicken Shawarma
- 1 lb boneless, skinless chicken breasts, chopped
- 1 lb boneless, skinless chicken thighs, chopped
- 1 t cumin
- 1 t paprika
- 1/2 t turmeric
- 1/4 t garlic salt
- 1/4 t allspice
- 1/4 t chili powder
- 1/8 t cinnamon
- salt & pepper to taste
- 1 C chicken broth
Directions
- To make the bread, combine all of the dry ingredients together in your mixer, then add in oil and water, mixing with the dough hook until smooth and elastic.
- On a floured surface, knead the dough for about 10 minutes.
- Place in an oiled bowl, covered with plastic wrap, to rise for about an hour.
- Separate into 6 equal balls, roll them out flat and grill them on a flat grill pan over medium heat.
- To make the chicken, combine all of your spices in a bowl, then add the chicken and mix well.
- Put into instant pot, cover with chicken broth and cook on poultry setting for 10 minutes.
- Let depressurize on its own for 10 minutes before releasing.
- Serve in laffa bread with pickled turnips and your preferred sauce (tahini sauce is traditional though I didn’t include a recipe here because I didn’t like how ours turned out).
It was a winner, all around.

grilled salmon with summer salad
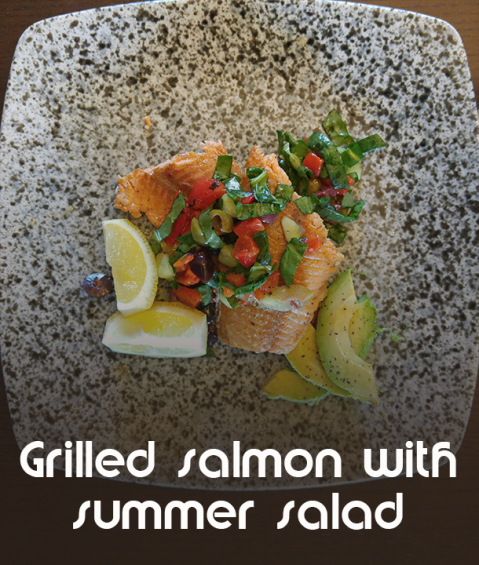
Grilled salmon tonight, thanks to neighbors who gave us some of their fresh caught kokanee salmon from Flaming Gorge.
Chef Guapo's Grilled Salmon with Summer Salad
Ingredients
Quick-Smoke Honey-Lemon Salmon
- 4 salmon fillets
- 4 lemons
- 1 T minced garlic
- 2 T honey
- 1 T olive oil
- 1 T salt
- 1 t crushed red pepper
- 2 bay leaves
- 2 C water
Summer Salad
- 1 cucumber (peeled)
- 1 red bell pepper (roasted and peeled)
- 1/4 c chopped kalamata olives
- 1 C spinach leaves (chopped chiffonade)
- 1 large avocado
Salad Vinaigrette
- 2 T champagne vinegar
- 1 t dijon mustard
- 1 T honey
- 1/2 t salt
- 1/2 t crushed black pepper
- 2 T extra virgin olive oil
Directions
- 2 hours ahead of time, mix all the ingredients for the salmon together in a large plastic bag or mixing bowl (juice 3 of the lemons and throw in the remains as well, but save one lemon for plating).
- Let the fillets marinade in the bowl or bag in your refrigerator for 2 hours.
- Heat up the grill. Tonight, I cooked over coals after burning down some of our stash of bundled wood. If available, use alder wood, which gives a really mild smoky flavor without over powering the fish (if you don’t have alder, then feel free to use whatever you have available; most wood is fine because the salmon is going to be on the grill for a very short time, so oak, hickory, and even mesquite would be fine). Your grill is ready when the coals are white and there is a low flame (you’re not going to cook over direct coals, because you still want a good amount of smoke coming off the coals–this is going to give your salmon an added depth of smoky flavor)
- Line your grill with two sheets of foil. You don’t really want your salmon exposed directly to the coals, and you also don’t want to mess with having the fillets get stuck to the grill.
- Place the fillets directly on the foil lined grill (if you’d like, drizzle a little honey right on top of each fillet–I did this tonight, because sometimes I just prefer the extra sweetness).
- Cover your grill and let it cook for 3-5 minutes; you won’t need anything longer than this–they’ll cook really fast depending on the thickness of each fillet and the heat of your grill (it’s important to cover the grill because that’s where you’re going to get the smoky undertones).
- Get your chopping skills ready. Cut the cucumber and roasted pepper into small, equal portions (1/8 in) and give a rough chop to your olives; chiffonade your spinach and toss all the ingredients into a small bowl.
- Mix all your vinaigrette ingredients except for the olive oil in a separate bowl. Slowly drizzle in the olive oil while whisking your vinegar mixture. This will cause your oil and vinegar to emulsify.
- Drizzle the vinaigrette over the summer salad (you’ll have more vinaigrette than necessary, so don’t drizzle all of it), and stir to combine.
- Slice some fresh avocado (season with a dash of salt and pepper) and lemon wedges.
- Plating: place your salmon in the center of the plate (cut the fillet into two pieces if you prefer, pictured above) and drop a handful of the salad right on top; add the avocado and lemon slices and enjoy!
Kids seemed to like it.

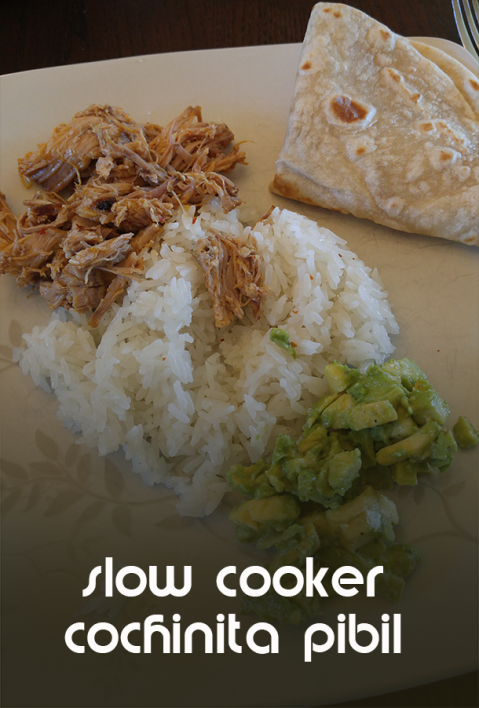
Slow cooker cochinita pibil (from RawSpiceBar monthly spice kit)
Tonight, we made one of the recipes that came from RawSpiceBar (Christmas gift from Mick and Tracy, woot) so the recipe I’m sharing comes ALMOST ENTIRELY from them. You won’t be able to copy it the same unless you buy their specific spice packet, Achiote Recado Rojo. From their site, it’s a blend that includes Annatto seeds, oregano, toasted cumin, black peppercorns, cinnamon, allspice, cloves, and habanero chiles.
I made the marinade yesterday so the pork shoulder could chill in it overnight. The woodsy spice smell, mixed with the citrus made the kitchen smell rather delightful.
 At dinnertime, my son went back for forkful after forkful of the meat. My daughter, ate some, which for a toddler, is acceptable. They then spent time trying to copy myself and my husband by making burritos out of the meat, rice, avocados, and sour cream. Eating is as much about the experience as it is about the food!
Recipe:
INGREDIENTS
Marinade:
4 cloves garlic, smashed
2 T veg oil
Achiote Recado Rojo (RawSpiceBar)
1/4 C white vinegar
1 orange, juiced
3 lemons, juiced
2 fresno peppers, deseeded
salt to taste
Pork:
2 lbs pork shoulder
Salt, tortillas, avocado, rice, sour cream to serve
Directions
Heat oil in skilled over medium heat until hot then add Achiote Recado Rojo, peppers, and garlic. Cook, stirring often, until fragrant (a few minutes). Pour into blender or food processor and add lemon juice, orange juice, vinegar, and salt. Blend until smooth.
Pour marinade over patted dry pork and rub in. Refrigerate overnight.
Put pork, marinade and 1 C water in slow cooker. Cook on low for 8 hours. Shred with fork and serve with tortillas, avocado, rice, sour cream… toppings of your choice.
P.S. (Can you write a P.S. on blog posts?) This recipe over on Serious Eats has ingredients listed out for those that want to try this and don’t have that special space packet. It uses annatto seeds, oregano, cloves, cinnamon, peppercorns, cumin, and allspice.

Pork Rounds not Rinds

It’s been far too long since I’ve posted a new recipe on this blog. I apologize. Turns out adding a baby to your daily routine really throws you off your regularly scheduled programming. Dominic is sleeping as I type this, but Lauren informs me that he has just woken up. I can hear him whimpering, which means he’ll be reaching full lung participation in about two minutes. Oh the joys of parenthood…
And it is a joy. Cooking takes a back seat to being a father. If I have to cut some corners so I can finish a bit quicker, then so be it. Every now and then I find some time to make a nice meal for Lauren. After all, she spends far more time with Dominic than I do. Don’t get me wrong, the little man has my full attention when I’m not in the kitchen, and I do what I can to alleviate some of the load for Lauren. Having a nice meal is a great way to say thank you. That’s what comfort food is all about.
People always gravitate to comfort food after a hard day’s work because it relaxes you for those ten minutes of indulgence. And this meal isn’t exactly comfort food, at least not in the traditional way that meatloaf is, but it’s pretty close. Lauren loves comfort food. In fact, I think she has asked me several times in the past few weeks for meatloaf, and for some reason I have failed to deliver. I promise I’m a good husband most of the time. So how do you tell someone thank you for all that hard work? Make’em a nice meal. Make’em comfort food. Or if you’re like me, make’em comfort food with a twist, like pork chops and applesauce (pronounced “pohk chawps ‘n applesahhhs”).
Pork Medallions with Apple-Potato Hash
4 Pork Medallions
4 Pieces Thickly Sliced Applewood Smoked Bacon
Tbspn Finely Chopped Rosemary
Course Ground Black Pepper
Kosher Salt
Garlic Powder
2 Tbspn Olive Oil
Preheat over to 375.
This one’s easy. Wrap the pork in bacon, and use kitchen twine to secure the bacon to the pork medallions. Season the top and bottom generously with rosemary, pepper, salt, and garlic. Heat a medium frying pan to medium-high heat. Add olive and cook the medallions on one side for five minutes. Turn and cook for another five minutes on the other side. Remove from stove and place in oven. Let cook for 5 minutes. Remove from oven and let rest for 5 minutes. Watch how hot your stove burns. You might need to adjust the heat and the cooking time. The one thing you don’t want is to dry out the pork.
All proteins will become terribly dry when overcooked, but pork and chicken are the worst culprits. Sometimes beef is a little forgiving, and while fish will also easily dry out, it’s one of those proteins that is easier to gauge when finished. I’m convinced that gravy was discovered because someone didn’t know how to properly cook meat, so in order to mask the dryness, the cook covered it with sauce. What a wonderful invention! Gravy is both delicious and useful for fixing those cooking mistakes.
Random side note: potato chips were also an accident. A customer continually complained about the thickness of his fried potatoes, so the cook cut the potatoes as thin as possible and quickly fried them just to make a point. Potato Chips! That’s the story according to Saratoga Springs, NY anyway. Sometimes kitchen accidents are a wonderful thing.
But there’s no gravy here. I love pork chops smothered in gravy as much as the next guy, and I especially love my pork chops a la ketchup (catsup?) just like Mom and Dad used to make’em, but we’re being nontraditional here. Depending on the thickness of the medallions, they should be just right–no sauce necessary.
Apple-Potato Hash
2 Large Granny Smith Apples
2 Medium Sized Russet Potatoes
1 Tspn Lemon Zest
1 Tbspn Lemon Juice
1 Tbspn Butter
1 Tbspn Honey
1 Tbspn Brown Sugar
Salt
Peel the apples and potatoes (save the apple peels for later). Shred the potatoes and apples using a cheese grater or food processor. Be sure not to shred the cores and seeds and keep the apple shreds separate from the potato shreds.
Heat a large skillet to medium heat and melt butter. Add the potatoes and season with salt. Stir occasionally to avoid clumping and sticking to the pan. In a small mixing bowl, combine lemon, honey, brown sugar, lemon zest and whisk well. Once the potatoes start to brown and become tender, add the apples and lemon-honey mixture. Stir to combine all the ingredients in the skillet and cook for 2-3 minutes (the apples do not take long to cook, and you want the apples to maintain some crunch for texture).
Apple-Balsamic Reduction
1 Cup Balsamic Vinegar
1/8 Cup Brown Sugar
2 Tbspn Apple Juice
3-4 Apple Peels
In a 1 quart reduction saucepan add all the ingredients. Stir well. Bring the mixture to a boil, and then reduce to medium and let simmer for 10 minutes. Reducing liquids can be tricky. It’s all about the consistency. How thick do you want the sauce? Ideally, you want to reduction to coat the back of a spoon, like cough syrup. The problem is, when the reduction is hot, it’s still very runny, so it’s hard to tell what the consistency will be like when it’s cool. Watch for how much liquid has evaporated out. I would reduce the liquid down to a fourth of its original size. If you want a syrupy consistency, which is what I like, then aim for 1/4 the original liquid. But, if you want a runny reduction, then reduce it to half the original liquid. Be careful. If you boil this down too much and too fast or too hot, then you will ruin the vinegar and you’ll have to start over.
Honestly, I’ve messed up my fair share of reductions, whether it’s balsamic vinegar or some other reduction I was working on. In fact, just the other day I was making a pomegranate reduction for creme brulee and had to do it twice. You can’t be afraid to mess up in the kitchen. Remember, sometimes kitchen mistakes create something wonderful (think potato chips).
Plating
The picture at the top of this blog says it all.
Start by placing the hash down on the plate. Remove the twine from the pork and place one medallion directly over the hash. If you have a squeeze bottle, then funnel the balsamic reduction into the squeeze bottle and make any design you’d like. If you have some spare apples, cut a few thinly sliced wedges and place on top of the pork medallion. If not, use a spoon to drizzle the reduction around the plate and serve.
Don’t forget to try new twists on old favorites. Don’t forget it’s OK to mess up. And most importantly, don’t forget to say thank you to those you serve. Lauren deserves a great meal, and so do all the people you love too.

Halibut – Eat Your Fish It’s Good For You

Wednesday night is indoor soccer night. Whenever Lauren finishes a game of soccer, you can bet she doesn’t want to eat something heavy; the same is true if she eats before a game of soccer. Case in point: heavy foods do not make for a good meal before or after a lot of physical activity. Sometimes, it’s best to keep things light and fresh.
I’ve already written about preparing your food without a heavy hand in previous posts–less is often more. If you want to go light, fish is an easy go-to protein; but, don’t think that fish is your only option. Many proteins have deliciously light preparations. Beef? Try carpaccio with an arugula salad. Chicken? Grill up some tenders with fresh lemon and thyme. Pork? Crusted tenderloin medallions with julienne green apple and zucchini. You get the point. Our most recent Wednesday soccer night brought us butter poached halibut with lemon-dill creme fraiche, saffron infused couscous, and a cucumber-pickle salad.
Butter Poached Halibut
When my mother was reactivated from the naval reserves after September 11, the house felt a little empty. My two older brothers were gone (Ryan was living in Utah, and Randy was in Paraguay; my mother was sent to Pensacola, FL for training and deployment), which left two lonely guys in a house with nothing to do. My father has always done most of the cooking in the family, not because my mother can’t, because I think he just enjoys it more. This means no mushrooms and no fish, because Mom hates those two things. When she left, Dad decided we were going to start eating fish. Nothing too fancy mind you; simple breaded fish with a squeeze of lemon or tartar sauce goes a long way (of course, we’re going to take a step further with this recipe, but don’t think you have to eat it this way). Normally, Dad would make the standard American dinner entree: main dish with one or two sides. With Mom gone, and the house feeling a bit empty, he just kept things simple. We ate fish fairly often, which was fine by me, because I like fish quite a bit. This dish reminds me of those days. Things were quiet; things were simple; dinner for two.
2 Halibut Filets
1 Stick unsalted butter
1 Tblspn lemon zest
Pinch of salt
In a medium frying pan (preferably non-stick), melt the stick of better over medium heat. Salt the halibut and place skin side down in pan. Sprinkle the lemon zest over the halibut and let the fish cook for 2-3 minutes. Lower the heat to medium-low and begin spooning the hot butter over the filets. Continue this process for 4-5 minutes. Carefully flip the halibut filets over and let cook for an additional 2-3 minutes. Depending on the size of the fish, this should cook each filet so it is flaky and moist. Cooking times always vary, especially with varying stove-tops, so be sure to check fish while it is cooking.

Lemon-Dill Creme Fraiche
Creme fraiche is sort of like the French version of sour cream (or the French version of mascarpone). It has a firmer texture than sour cream and it’s a bit tangier. It might be hard to find in your local grocer–here in Utah, Harmon’s has it located in the deli section with the specialty cheeses and meats–but you can easily use sour cream or mascarpone for this refreshing sauce as well.
3 Tblspn Creme Fraiche
1 1/2 Tbslpn fresh dill, roughly chopped
1 Tspn lemon juice
1 Tspn lemon zest
Combine all the ingredients in a small bowl and mix to combine. Don’t whip the cream too much, or it will lose its texture and could potentially become clumpy. If it does, add a little lemon juice to lighten it up again.
Cucumber-Pickle Salad
The little salad is mostly a palette cleanser, so you don’t need to make tons of it. It’s nice to have something off to the side of your main dish that you dive into every now and then just to refresh the dish and then go back for more of the main entree.
1 English Cucumber (seedless)
1 Dill Pickle
1 Tspn Champagne Vinegar
1 Tspn Extra Virgin Olive Oil
Pinch of salt
You actually only need half the cucumber for this recipe, but feel free to use the whole thing if you want more. Also, you want a dill pickle that has a good crunch to it. I use Clausen’s Kosher Dills, but Vlasic dills are just as good. You don’t need to peel the cucumber. Start by cubing half the cucumber into 1/4 inch cubes. Do the same for the pickle. Combine all the ingredients in a small bowl and mix to combine.
Saffron Couscous
Couscous comes in various forms, but for this recipe we are simply using instant couscous found in most grocery stores (real couscous would require a lot of steaming and more time). I was first introduced to couscous when I was living in Trapani, a small city in western Sicily. African culture influences Sicilian culture quite a bit, which is why Sicilian cuisine often infuses more spices and bolder flavors. However, when it comes to couscous, the Sicilians like it pretty plain. Usually, Sicilians serve couscous with fried fish. They fry the fish whole, fluff their couscous, and then pour some fish broth over the couscous, for a little added flavor. It’s a meal all by itself, and it’s delicious. I wanted to marry memories of my father’s fish with memories of Sicilian couscous, so I decided that a little saffron would boost the flavor without over-complicating the dish.
A quick word about saffron: it’s expensive and bold. You don’t need to use saffron in this dish, but it adds a sweet and earthy flavor to the couscous. Use it sparingly, as it is expensive, but can easily take over a dish if used too abundantly.
1 Cup Moroccan Style Couscous
1 Cup Fish or Chicken Stock
1 Tblspn Butter
Pinch of Salt
Pinch of Saffron
The directions on the couscous package usually explain fairly easily how to prepare couscous–we’re just adding an additional step with the saffron and replacing the water with stock. Melt the butter in a small pot and combine with stock. Add salt and saffron. Bring liquid to a small boil and add couscous. Stir to combine and remove from heat. Immediately cover and let sit for 5 minutes. Uncover and fluff the couscous with a fork. It should be light and fluffy.
Plating
Plating is simple for this dish. Add a spoonful of couscous on one side of the plate and drizzle some of the butter that the fish was cooked in over the couscous. Place one halibut filet over the couscous and add a dallop of creme fraiche to top. On the opposite side of the plate, add a 1/4 cup of cucumber-pickle salad.
Fresh. Simple. Tasty. Eat it after a physically exhausting day. Eat it if you’re making dinner for two. Eat it because it’s good. Enjoy.
Well-cooked Short Ribs Ain’t Short on Flavor

Braising is such a satisfying process; it’s almost like deep frying–you can deep fry anything and it would taste good. You could probably braise anything and it would taste good. Except for maybe liver. Nobody likes liver. Pogi doesn’t even like liver. Then again, Pogi doesn’t like anything that isn’t Tuna or Science Diet. But you can’t just dump something into a braising liquid and walk away. Braising is largely about building flavors, and then allowing those flavors to slowly transform your food into something spectacular.
Braising is a method of moist-heat cooking in which the item being cooked is covered or partially covered and left to simmer over a period of time. Think pot roast. When people think of braised foods, they generally think of tough proteins–pork shoulder or brisket, because heat, moisture, and plenty of time help break down collagen, the tough connective tissue found in meat–but you can braise most foods, though I wouldn’t necessarily recommend it. Stick to some of the more tough, fibrous proteins, but don’t be afraid to braise artichokes, root vegetables, or chicken.
Braising require a liquid, and water is an easy and practical choice, but if you want to really punch your food in the mouth with flavor, try using various broths and stocks for depth of flavor. And this is where things really get fun.
I love building flavors when I cook. Braising allows you to build flavorful sauces with any number of ingredients. Vegetables are a great source of flavor, and that’s where we’ll start with this recipe.

Braised Short Ribs with Panko Gremolata and Slow-Roasted Root Vegetables
Braised Short Ribs
4 Short Ribs (Bone in)
1 Large Yellow Onion (quartered)
3 Cloves Garlic (peeled and smashed)
1 Tbspn Salt
1 Tbspn Black Peppercorns
5-6 Dried Portobello or Shiitake Mushrooms
2 Large Celery Stalks (leaves included, roughly chopped)
2 Carrots (peeled, divided)
1 Herbal Sachet (Rosemary, Thyme, Bay Leaves)
1 Quart Beef Stock (unsalted)
1/2 Quart Water
1 8oz Can Whole Peeled Tomatoes
One of the great things about braising is how simple and quick it can be to prepare. If you’re like me, then you constantly wish you had line chefs to which you could just delegate all the prep duties. Luckily, you’re just going to throw all these ingredients into a pot, so who cares how well you chop the onion or how even each carrot turns out? It doesn’t matter! Just chop’em up and throw’em in. You can prepare this meal the night before, stick it in the fridge, and throw it all together in the slow cooker as you walk out the door for work that morning. In fact, that’s exactly what I did. If you look at the picture above, you’ll see that I cut all the veggies, prepared the sachet, and sealed it all up in a ziplock over night. I also trimmed the meat and stored that in the fridge as well. Usually I don’t cut the bone out of the short rib–it has so much flavor; I removed the bone this time around so I could more easily trim the fat (sometimes the fat can be cumbersome to remove after cooking due to the tenderness of the meat, so it’s best to remove it beforehand).
Combine all the ingredients into a slow cooker large enough to fit all the ingredients (we have a 6-quart slow cooker, which fits everything comfortably; if you’re using a 4-quart container, you will probably have to scale the recipe back a bit). If you don’t have a slow cooker, you can easily throw this in a pot large enough to hold all the ingredients and cook it in an oven (275F for 5-6 hours). Turn your slow cooker to low, cover, and let it go for at least 5-6 hours. I prefer to give it a good 8-10 hours to really let the meat absorb flavors and become fork tender. If you plan on doing this before work like I do, then by the time you get home all you’ll have to do is prepare the veggies and dinner will be ready.
*Generally, when you braise meat, you should sear all the sides before placing it in the braising liquid. This provides a great additional texture, but it isn’t necessary. If you’re doing this in the morning before work, you probably won’t want to fuss with that. I actually braise the short ribs, season them with a little salt and pepper, then sear them quickly after the braising process. For additional texture, I also torch the the corners and center surfaces (if you don’t have a blow torch don’t worry about it, searing the outside is most important).
Panko Gremolata
1/2 Cup Panko Bread Crumbs
1 Tbspn Lemon Zest
1 Tbspn Finely Minced Garlic
1/4 Tspn Salt
2 Tspn Balsamic Vinegar
2 Tbpsn Finely Chopped Parsley
A gremolata is a chopped herb mixture generally used for garnishing a protein. Italians sprinkle this over meat dishes, the most common being a veal milanese or ossobuco. A basic gremolata almost always includes parsley, lemon zest, and garlic, but you can get creative and create your own gremolatas. For this recipe, I start with a base of parsley and bread crumbs and build from there.
In a small bowl combine all the ingredients except for the vinegar. Stir to combine well and then slowly add the vinegar. The crumbs will absord the vinegar quickly, so stir constantly in order to get as much of the crumbs coated with the vinegar as possible.
Roasted Root Vegetables
Carrots
Turnips
Potatoes
Olive Oil
Salt
Pepper
2-3 Sprigs Fresh Rosemary
2-3 Sprigs Fresh Thyme
Slow roasting root vegetables is as easy as it gets. Preheat your oven to 350F. Wash and peel your vegetables (if you like the skin on your potatoes, feel free to leave the skins on, but peel the turnips and carrots). It is important to cut your vegetables roughly the same shape and size as the other vegetables, in order to ensure each piece cooks evenly with the rest. The carrots will be tricky, because of their odd shape in comparison to the other vegetables (parsnips as well, which I don’t use here, but would also be delicious to add). Use the larger ends of the carrots and save the smaller ends for something else, because the small ends will likely become overcooked and eventually burn (store in a zip lock back and eat carrots as a healthy snack later in the week; besides, bagged baby carrots are far more expensive then the loose bunch carrots at the store–it’s a win-win situation). Place your chopped vegetables in an oven safe dish, such as a pyrex dish or even a cookie sheet with quarter-inch walls. Drizzle olive oil over the vegetables and season with salt and pepper. Stir the vegetables around to make sure each piece is lightly coated with oil (don’t go overboard with the oil, you don’t need to drown them). Add the sprigs of rosemary and thyme on top and let cook in the oven for at least and hour and a half. If you have plenty of time, cook them at a lower temperature for a longer time period (slow roasting vegetables like this brings out their natural sweetness). Cooke until the vegetables are fork tender. Discard the rosemary and thyme when done (you can crush the thyme over the vegetables if you want the additional seasoning, but I like the natural flavor and sweetness of the vegetables on their own).
Plating
Pile a small amount of root vegetables in the center of the plate (if you’re using rectangular plates like I do, then pile them off to one side). Place one short rib directly on top of the vegetables, and place another short rib leaning against the first short rib. Take 1 piece of carrot, potato, and turnip, and place them on the opposite side of the plate if you’re using rectangular plates. If not, skip that step. Ladle a small amount of the braising liquid directly over the short ribs (I prefer to reduce some of the braising liquid with a very light roux to create a slightly thicker sauce that won’t run all over the plate, but some people like the flavor and texture of the braising liquid as is; in the above picture, the bottom-right corner picture shows a pot of the reduced braising liquid that has been reduced, whisked, and thickened). Garnish the meat with the gremolata and serve. If you want to add a little color, feel free to add a sprig of parsley on top of the short ribs.
This is one of my favorite recipes for it’s rich flavor and sheer simplicity.
Enjoy and buon appetito!
Mmm, Meatloaf

I enjoy watching chefs on TV. There’s something about watching other people cook that fascinates me. Anyone can follow a recipe, but it’s the subtle differences in how you work in the kitchen that really makes things interesting. Why do chefs hold a knife the way they do? Or a whisk? Some chefs have multiple towels in the kitchen, each serving a separate and unique function (I try to keep three towels at all times: one for wiping my hands when working with food, one for wiping down counters, and one for drying my hands after washing them). How do we really evaluate the performance of a chef? The food of course. Is it delicious? If yes, then the chef must be good, right?
Bobby Flay once said when he hires a new chef, he has that chef do one thing: cook an omelet. He didn’t say anything about making delicious food. Cook an omelet. Why an omelet? Because it’s so simple. Can you do the simple things? Can you make the simple things taste good? It’s nice to have a fancy meal; it’s nice to make it look fancy. It’s even better when it tastes as good as it looks. Bobby Flay wants to know if you can take something so simple as an omelet and build complex flavors. I can respect that.
The other night Lauren and I had some baked chicken, which I then shredded and combined with a basic chicken broth , rice, and boiled vegetables. Simple, but good. Italian cuisine taught me one thing: keep it simple, then learn to build complex flavors.
I remember sitting around the dinner table in Italy, listening to the Italians go on and on about how Americans don’t know how to cook because we use too many spices. Too many spices! “Too many things on the plate,” they would tell me, “a tomato should taste like a tomato, period.” Italians don’t compromise when it comes to cooking. “Fai cosi, non cosi, ma cosi, punto!”
“Do it like this, not like that, but like this, period.” That’s what Italian grandmothers taught me. They know Bobby Flay is right when he says he wants to see how well you can do the basic things. In Italy, if you can’t make tomato sauce, you don’t eat. I spent five months learning how to make a basic tomato sauce. Five months. Five long months. And you know what I learned? Tomato sauce is pretty complex stuff, unless you know how to do the basics.
Eight years later and I am still applying those basic cooking techniques Nonna taught me in Italy: learn to do the basics, then build complex flavors.
It doesn’t get more basic than meatloaf. It’s meat. It’s in the shape of a loaf. What else do you need to know? Americans have been eating this giant meatball for years. Everyone has a meatloaf recipe. The TV dinners in aisle 9 have a meatloaf recipe. Thanks Hungry Man. I have several myself. I like this one because it’s exactly what I love about taking something so simple as meatloaf and making it special.

Meatloaf with Mashed Potatoes and Brown Gravy
First, don’t make your meatloaf with beef only. Use a mix of pork and/or veal. But do make sure that beef is your primary protein–it should taste beefy. Combining the beef with other ground meats will help keep the overall loaf juicy and tender. No one wants a dry piece of meat. For this recipe, I’m only using ground pork, but if you don’t mind adding a few dollars to your meal expenses, feel free to add a little veal as well.
1 1/2 lbs Ground Beef Chuck (80% lean)
1/2 lb Ground Pork
2 Large egg yolks
1 Tbspn Salt
1 1/2 Tspn Ground Black Pepper
1 Tspn Garlic Powder
1/2 Tspn Dried Thyme
1/4 Cup Grated Parmesan
1/4 Cup Panko Bread Crumbs
1/3 Cup Plain Bread Crumbs
Mirepoix
Learning how to make a mirepoix was one of the best things I ever learned how to do in the kitchen. A mirepoix is a mixture of celery, onions, carrots, and sometimes an added aromatic or fresh herb. It is one of the basic flavor building compounds of many great tasting dishes, including one of my absolute favorite dishes: braised short ribs. In this recipe, I use a basic mirepoix, chopped very fine, to incorporate into the meatloaf for a greater depth of flavor.
1 Large Yellow Onion (finely chopped)
3 Celery Stalks with leaves (finely chopped)
2 Medium Carrots (cubed)
2 Large Garlic Cloves (minced)
1 Tbspn Tomato Paste
2 Tbsp Olive Oil
Bring a large pot to medium heat and add the olive oil (technically, this is more of a soffritto, since we’re using olive oil, whereas the French mirepoix uses butter). Add the vegetables and reduce to medium low heat. Let the vegetables sweat for 10 minutes and then add the garlic. Add a pinch of salt and pepper and stir. Add the tomato paste and stir. If the vegetable clump together too much, reduce the heat to low and add a few tablespoons of water, one at a time, until the mixture stirs easily. Remove from heat and set aside.
Heat the oven to 325F.
Bring all the raw meatloaf ingredients together in a large mixing bowl except for the panko bread crumbs. When mixing the meat to combine all the ingredients, do not press down with the palms of your hands and then close your fingers as if to make a fist. This will mash the meat and make it tough. Instead, use your hands the same way you would fold in egg whites to a batter. Add half the mirepoix and combine slowly. Then add the remaining mirepoix and combine. Place the meat mixture into a bread baking tin. You might have experience with making meatloaf by forming it into a loaf on a baking sheet with parchment paper–don’t do that with this recipe. The mirepoix adds a lot of moisture to the meat, so it won’t hold its shape very well uncooked. Do not mash to meat into the tin, pat it lightly, and then sprinkle the panko bread crumbs on top. Bake in the oven for about 1 hour, or until the internal temperature reads 160 degrees. Remove and let rest for 5 minutes.
Mashed Potatoes
What is more satisfying than creamy mashed potatoes smothered with gravy? I prefer Golden Yukon potatoes for their creamy texture and golden color, but russet potatoes are always a favorite.
6 Medium Sized Golden Yukons (peeled, cubed)
3 Sprigs Fresh Rosemary
3 Sprigs Fresh Thyme
1/4 Cup Heavy Cream
1/3 Stick Unsalted Butter
1/4 Cup Milk
Salt and Pepper to taste
Bring a pot of water to a boil. Generously salt your water. Wrap the rosemary and thyme in cheesecloth and tie off with kitchen twine. Add potatoes and sachet (cheesecloth with fresh herbs). When potatoes are fork tender, remove sachet and drain potatoes. Do not rinse. Place the potatoes back into the pot and place over very low heat. Add butter and milk, and begin mashing. Add the heavy cream and continue mashing. The low heat will help remove any excess moisture from the potatoes as you combine the other ingredients. Mash until you reach your desired texture.
Brown Gravy
I start most gravy recipes with a basic roux. A roux is a mixture of flour and fat, usually butter, to thicken a sauce. It is used to thicken some of the French “mother sauces.”
For the roux:
1 Tbspn Flour
2 Tbspn Butter
Additional Flour
Gravy:
2-3 Cups Beef Stock
1/8 Cup Heavy Cream
1 Tbspn Worcestershire Sauce
1/4 Tspn Garlic Powder
1/4 Tspn Onion Powder
Salt and Pepper to taste
Over low heat melt the butter and then add flour. With a whisk, combine the flour and butter. You should get a yellow pasty looking mixture (see picture above. Warning: the above picture was used to make a large pot of gravy, so I used much more butter and flour). If you want thick gravy, add a little more flour to your roux. If you like your gravy thin and runny, then 1 tbspn is plenty. Combine the other ingredients and stir. Let simmer over low heat for 5 minutes, stirring constantly. Salt and pepper to taste.
To plate: Place a generous amount of mashed potatoes in the center of the plate or bowl, ladle gravy over potatoes, place 1 slice of meatloaf directly over the potatoes, add a small ladle of gravy over meatloaf, and garnish with fresh or dried parsley or chives.
Cooking simple never tasted so good.
Salmon and Pasta: So Happy Together

Pogi helped with dinner the other night, by coming in to see if we needed any help.

We told him that we got this. Besides, he only likes tuna and cat food.
And marshmallows; actually, he doesn’t really eat the marshmallow–he pulls it out of the bag and tosses it around for a while. Well done cat. Well done.
Pogi is a true tuna fan. I like tuna as well–in a can or fresh–its’ all good. He won’t eat salmon, which is fine by me, because salmon is delicious–more for me. We choose to get our omega-3s in our own way. He likes his omegas it straight out of the can, no salt needed. Lauren and I prefer something a little more sophisticated.
Honey-Lemon Salmon with Bacon Panna Pasta
Cooking fish is tricky. Much like chicken, fish will easily dry out if you overcook it. The secret to cooking flaky, moist fish? Only cook one side. If you cook one side of the fish on medium-low heat, you’ll end up with a lightly crusted bottom and a buttery soft top. Fish cooks quickly enough that you won’t burn the bottom before the heat cooks the rest of the fish all the way through. Admittedly, sometimes this will leave a slightly underdone side, which may not be the preferred texture for everyone. Lauren doesn’t like raw fish, and if you only cook one side, you can see how this could be a dilemma. The solution? Carefully flip the fish over when it’s nearing completion and you won’t have to worry about any raw fishy textures or flavors.
I also find that fish is the perfect protein to learn how to tell whether or not your meat is done by using the tip of your finger. Find the thickest part of the fish, generally the center, and push down with the tip of your index finger. It should offer some resistance with a slight springiness. This will work for most proteins, especially most cuts of steak, but I would avoid using this method with very thin cuts of meat–it just doesn’t work the same. If you don’t want to use the 1-side method for fish, cook both sides and test the readiness with the tip of your finger: mild resistance, slight spring. Or just poach your fish in clarified butter. You can’t go wrong with butter.

Honey-Lemon Salmon:
This recipe will prepare two 6oz salmon fillets
2 Tblspn Honey
3 Tblspn Unsalted Butter
1 Tblspn Brown Sugar
2 Tspn Lemon Juice (freshly squeezed)
1 Tspn Dijon Mustard
Zest from 1 lemon
Salt
Prepare a medium frying pan on medium-high heat. Melt the butter and brown sugar. Add honey, lemon juice, and zest. Reduce to medium-low heat. Whisk in the mustard once the all the ingredients have melted together. Salt both sides of the salmon fillets generously and then place side-by-side in your prepared frying pan. Let them cook for 6-7 minutes on one side over medium-low heat. Depending on the thickness of your fillets, adjust the cooking time as required. While the fillets are cooking, with a small spoon ladle small amounts of the honey-lemon-butter over the top of the salmon (this will also aid in the cooking process). You won’t need to cook both sides of the fish as I previously stated, but if you’d like, flip the fillet over for 30 seconds to a minute to complete the cooking process. Set them aside on wax paper and briefly let them rest.
Bacon Panna Pasta:
Whenever I prepare a basic cream sauce for pasta, say a traditional Italian panna sauce (alfredo sauce in the US), I almost always start with butter and shallots or garlic. For this particular pasta, I first start with bacon fat and work from there. Who would argue with that? Your waistline maybe, but you can’t please everyone.
4 Strips thick-cut bacon, cut into thin strips (traditional or smoked, doesn’t matter)
2 Cloves garlic, minced
1 Pint Heavy Cream
3/4 Cup finely grated parmigiano-reggiano
Salt
White Pepper
1/4 cup finely chopped Italian parsley
Pasta of your choice (recommend a long pasta such as spaghetti or fettucine)
In a medium saucepan, cook bacon strips over medium heat. When the bacon begins to shrink and crisp, remove bacon with a slotted spoon and place on paper towels to absorb grease. You should be left with bacon fat in your saucepan. Reduce the bacon fat by half, reduce your heat to med-low, and add the minced garlic. Work quickly, as you don’t want to burn your garlic (10-15 seconds over med-low heat). Add the heavy cream and whisk to incorporate the bacon fat. Let sit for 3-4 minutes, whisking once in between. Add a dash of salt and pepper, then add the parmiggiano. Whisk until you are left with a smooth texture. Add salt to taste (generally, I add a little more salt when I’m making a more traditional panna sauce, but since this one uses bacon fat, which is already salty, you shouldn’t need much more, if any).
Cook the pasta according to the package directions with plenty of salt in your pasta water (Thomas Keller says it should be as salty as the ocean). For this meal, I used spaghetti (number 5 thickness, but 3 or 7 is fine as well). When done, drain the pasta water, but don’t rinse your pasta. Mix 3/4 of the sauce with the pasta.
To plate:
I prefer pasta bowls whenever we eat pasta, but a flat plate is fine here, especially since this sauce is not particularly runny. Using tongs, grab a portion amount of one end of the pasta and twist onto the plate, so that you create a small mound of pasta in the center of the plate or bowl. Spoon over some extra sauce. Place one salmon fillet directly over the center of the pasta. Garnish with parsley and bacon crisps. If you’d like, top your salmon with a slice of lemon.
Buon appetito!
One of the Great Cooking Tips: Just Cook

There’s a list on the Food Network of the 100 Greatest Cooking Tips (of all time!). You read that right… OF ALL TIME.
Anyway.
I reviewed the list and am going to give you the ten best because 100 is a lot to read and do you really have that much time? That’s what I thought. Clearly, I do (but that’s because I read so FAST, duh).
- After working with garlic, rub your hands vigorously on your stainless steel sink for 30 seconds before washing them. It will remove the odor.
- For best results when you’re baking, leave butter and eggs at room temperature overnight.
- Instead of placing a chicken on a roasting rack, cut thick slices of onion, put them in an oiled pan, and then place the chicken on top. The onion will absorb the chicken juices. After roasting, let the chicken rest while you make a sauce with the onions by adding a little stock or water to the pan and cooking it for about 3 minutes on high heat.
- Do not use oil in the water when boiling pasta: it will keep the sauce from sticking to the cooked pasta.
- Rest, rest, rest! Always let your meat rest – especially off a hot grill!
- If you’re cooking cauliflower, add a bit of milk to the water with salt to keep the cauliflower bright white. Shock it in cold water to stop the cooking and then serve.
- When making mashed potatoes, after you drain the potatoes, return them to the hot pan, cover tightly and let steam for 5 minutes. This allows the potatoes to dry out so they’ll mash to a beautiful texture and soak up the butter and cream more easily.
- Cook more often. Don’t study; just cook.
- Cook with other people who want to learn or who know how to cook.
- Always start with a smokin’ hot pan!
Frying Up Some Brussel Sprouts
New York Steak with Deep Fried Brussel Sprouts and Jalapeno-Cheddar Cream Sauce

For the steak:
The great thing about almost any cut of steak is how little it takes to make it good: a little salt, some pepper, and a good sear. Searing a steak on a hot frying pan can be just as enjoyable and delicious as cooking a steak on the grill (get yourself a good frying pan that retains its heat well, like a stainless steel-wrapped aluminum pan or if you can afford one, a copper fry pan). Guys, if you want to impress the ladies, you have to show them that your skills extend beyond the grill.
This recipe uses a thinly cut New York Strip; it’s cheap, delicious, and cooks quickly. Any cut is fine, and a sirloin would do just as well. Be sure to prep your meat at least 5 minutes before you plan to cook it–bringing your meat up to room temperature is important for even cooking. Generously apply salt and pepper to one side and let sit.
In the meantime, melt a tablespoon of butter over low heat and throw in a sprig of thyme or 2 bay leaves (a bay leaf is pictured, but I prefer thyme). Once your butter is melted, turn your heat up to medium-high/high depending on your stove. Don’t throw the meat in the pan right away; give it a minute to heat u, then place the seasoned side down and let it sear. Don’t move the meat–allow it to get a good sear for 2-3 minutes. Season the other side while in the pan. After 2-3 minutes, flip the steak over and allow it to cook for another 2-3 minutes (depending on the thickness, cooking times will vary–for this cut of meat, 2-3 minutes on each side will give you a medium-rare finish).
Take the meat off the heat and transfer to a plate and cover with foil. Let the meat rest for 5-10 minutes before cutting into it.

Deep Fried Brussel Sprouts with Mustard Vinaigrette
Lauren loves brussel sprouts–sauteed in a lemon cream sauce, slowly steamed in a shallow pool of rich chicken stock, or simply pan-fried with salt and butter–so I try to take this little cabbage and push the limits with it. Everything is better deep fried right? This recipe is so simple you don’t even need a fry batter. This recipe is tailored for about 12-15 large brussel sprouts, so you may need to adjust the amount of vinaigrette depending on the number and size of the brussel sprouts you’re using.
We use a deep fryer, but you can fry these in a deep frying pan over the stove as well. Vegetable oil works great, but if you want to really go crazy, deep fry these little guys in duck fat or lard (it will go straight to your gut, but you can feel good about it because brussel sprouts are healthy for you too–they cancel each other out right?). Heat your oil to 350F.
Cut each sprout in half if you’re working with large sprouts, which I prefer, but if your grocer only has the little sprouts, ignore cutting them at all and toss them right in to the oil raw. Yes, raw. No batter. No seasoning. Raw. Working in small batches, 4-5 per rotation. Let them fry for about 3 minutes and then pull them out with a slotted spoon and set them on a few paper towels to absorb any excess oil that drips off.
For the mustard vinaigrette:
3 Tblspn Extra Virgin Olive Oil
1 Tblspn Champagne Vinegar
1 tsp Dijon Mustard
1 tsp crushed dried parsley
1/2 tsp fine kosher salt
1/4 tsp ground white pepper
2 Cloves finely chopped garlic
Whisk all the ingredients except the olive oil in a large mixing bowl. Add 1 tablespoon of olive oil and whisk, repeat with each tablespoon of olive oil. Set aside.
When all the brussel sprouts have been fried, pour them into the large mixing bowl with the vinaigrette and stir to coat every single sprout. Don’t worry if some of the leaves on the brussel sprouts fall off. It’s nice to have a few loose leaves to use for plating.
For the Jalapeno-Cheddar Cream Sauce:
I love cooking with heavy cream, because you can infuse all kinds of flavors into it. This sauce is slightly salty and sharp with a mild bite thanks to the jalapeno.
1 pint heavy whipping cream
1 clove garlic, minced
1 jalapeno, seeded, ribs removed, and finely chopped
1 1/2 cup finely shredded white cheddar
1 Tablespoon unsalted butter
In a medium sized pot, melt the butter over medium-low heat. Once the butter is melted, add the garlic and jalapeno (if you want a spicier dipping sauce, feel free to leave the ribs in or add some or all of the jalapeno seeds). Saute for 20 seconds and then add the heavy cream. Bring the cream to medium heat (do not let it boil, this will ruin the cream and your sauce). Reduce to low heat, add the cheese and whisk until smooth and creamy. The sauce should be slightly thick, but not clumpy–it should easily coat the back of a spoon.
To finish:
Pour a quarter cup of cream sauce into individual bowls and set aside. Place the meat on the center of the plate and stack 3-4 brussel sprouts on top of the meat. Place 2-3 additional sprouts around the plate (this is a good time to use those additional leaves that fell off when you tossed the sprouts with the vinaigrette). Place the individual dipping bowls on the edge of the plate and serve. The sauce compliments the steak quite well, but you can toss a brussel sprout in there as well if you’d like.
I didn’t know Lauren was going to take a picture of the final product. You would think I would have learned by now that she almost always pulls out that smart phone of hers come dinner time, but alas. The plating isn’t spectacular in the picture, but we ate it all the same.
 Chocolate & Zucchini
 Everybody Likes Sandwiches
 Only Soups
 Sciolist in the City of Salt and Saints
 The Wednesday Chef